Create Master Item Default Attribute Values
This tutorial will show you how to create a master item with default attribute values to make the receiving process faster and more efficient.
1. Navigate to Inventory>Receive Inventory.
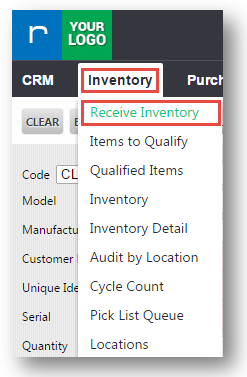
The Receive Inventory page will be displayed.

2. Enter the model number in the Model field.
3. Click ( ) icon.
The Update Master Item dialog will be displayed.
4. Navigate to Attributes tab.
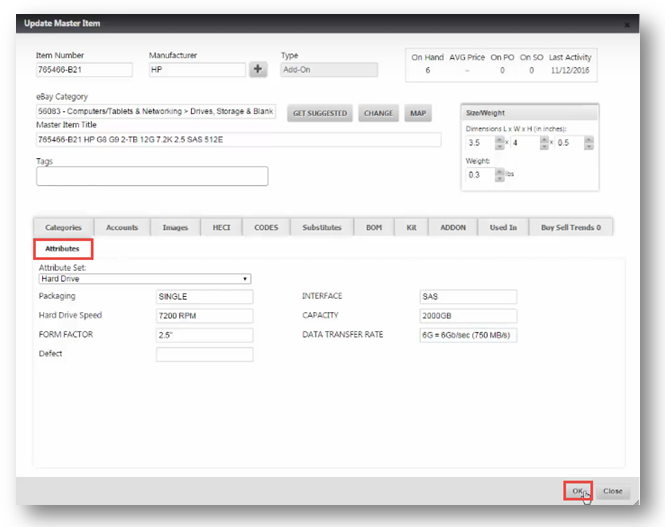
5. The default values can be used. But still, you may select the required custom values from the respective fields.
6. Click OK.
The Receive Inventory page will be displayed.
7. Click CLEAR.
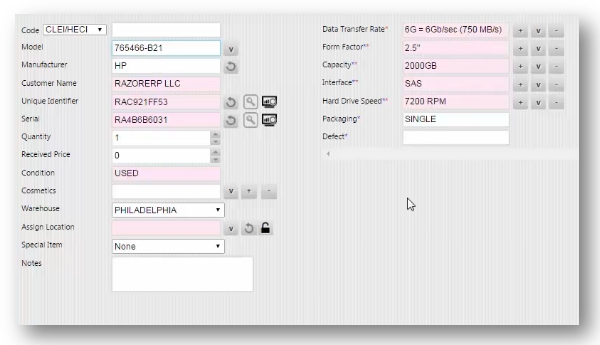
8. Enter the same model number in the Model field.
The attributes of the model will be displayed automatically in the right section of the page.
Edit Attribute Values
1. To edit attribute values, navigate to Inventory>Master Items.

The Master Items page will be displayed.
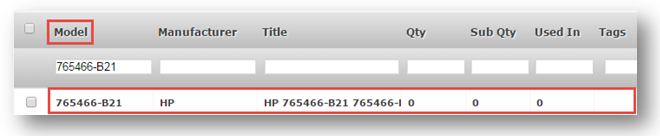
2. Enter the model number in the Model field.
The model details will be displayed in the list. Double click the model to edit.
The Update Master Item dialog will be displayed.

3. Navigate to Attributes tab.
4. Edit the values in the required fields.
5. Click OK.
The attribute values will be updated successfully.