Set a Category for an Item while Receiving
This tutorial shows you how to set a category for an item while your team is receiving it.
1. Navigate to Inventory>Receive Inventory.

The Receive Inventory page will be displayed.
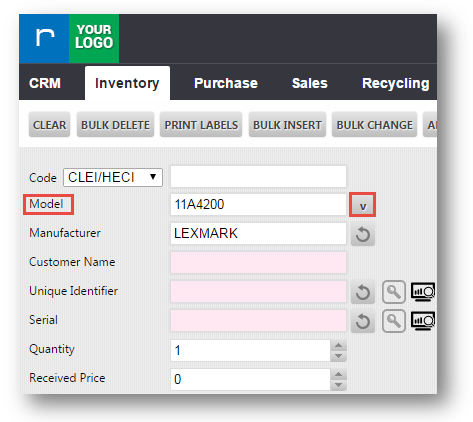
2. Enter the model number in the Model field.
3. Click ( ) icon.
The Update Master Item dialog will be displayed.
4. Navigate to Categories tab.
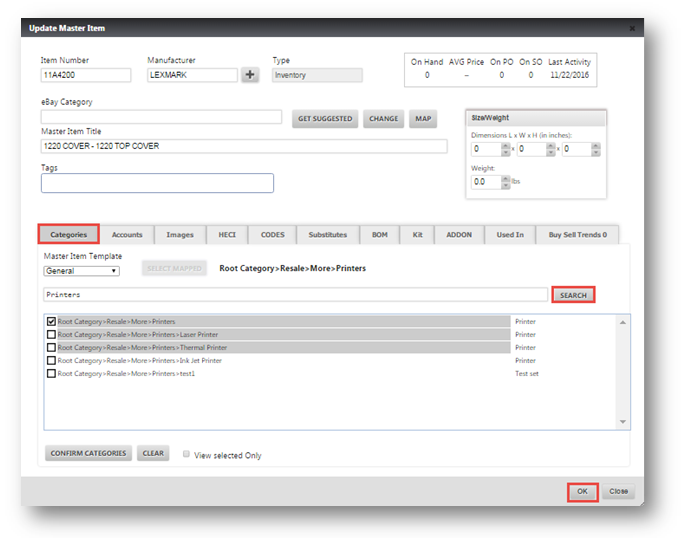
5. Enter the sub-category in the text box.
6. Click SEARCH.
The list of categories will be displayed.
7. Select the required category from the available list.
8. Click OK.
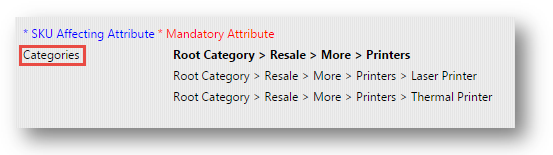
You can view that the categories for the specific model will be displayed under the Categories section in the Receive Inventory page.