Load Outbound Order
This tutorial shows you how to load an outbound order. There are three ways to load a lot to an order.
1. Choose from a lot from a drop down field and click Add.
2. Manually enter the lot ID # in the Quick Add field and click Enter.
3. Place your cursor in the Quick Add field and scan in the Pallet ID.
The third option is the ideal way to load the lots onto a truck, but it requires you to have a station at your loading dock and a compatible wireless scanner.
1. Navigate to Recycling>Outbound Orders.
The Outbound Orders page will be displayed.
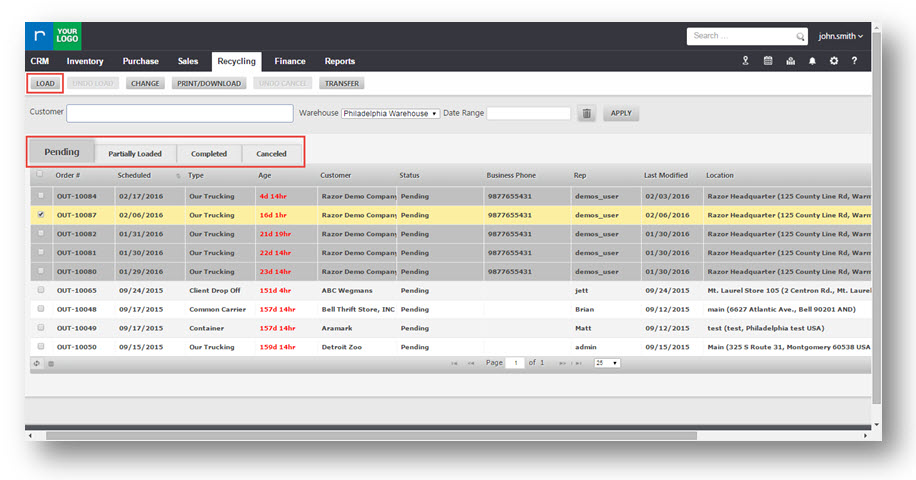
You can view all the outbound orders that are in the system.
The tabs on the top such as Pending, Partially Loaded, Completed and Canceled show different statuses of the orders.
- Pending- Shows all the open orders that have not started the loading process.
- Partially Loaded- Shows all your orders that you have started the load process, but did not complete.
- Completed– Shows all completed outbound orders.
- Canceled – Shows all orders that are canceled.
2. In the Pending tab, select the outbound order. In this example, the outbound order 14090 for customer ABC123 is selected.
3. Click Load button at the top left.
The Load Outbound Order page will be displayed.

At the top, you will find primary details of the order like the Customer Name, Order Number, Order Date etc.You will find the REP that created the order, Warehouse it’s tied to, Shipping Method which is Truck, Shipping Option which is Our Trucking, Truck Type as 24 Ft Truck.
So you can create trucks in the system and then assign the trucks to orders. In the example here, we use our 24 ft truck.
Check Status: Pending at the top right and you will also see Item Count field. So once we sort adding our lots this field is going to increase. The Loaded Weight progress bar shows that there is a 0 at of 10,500 pounds.
Note: The second number of the fraction(10,500 lbs) represents the max weight limit for the truck assigned to this order.
This way you will not exceed the maximum weight while loading the lots.
On the right, you have a place to add attachments in the Attachments section. If you scroll down, you have Order Comments and Loading Notes if you need to add any notes on this order.
These are the 2 ways to start loading your truck.
4. You can either click in the Lot# field here and choose a lot that’s in the system. In the example here, lot 386 is selected. You can see the details about the lot like the Commodity Name, Weight, Tare, Item Count and Net Weight. Once you select the lot click Add.
In the example here, we add a lot 387 to this outbound order.

5. You can see at the top in Status: Partially Loading, it’s been partially loaded and unloaded one lot so far and we have 333 pounds of 10500 max.
Or
6. Navigate to Inventory Details.
The highlighted tabs show the workflow in which the lots are in.

7. To view lots in final stage or finished goods, click Finals.
You can view all the lots in your system.

8. Click in the scanner and add a lot by adding a lot number.

If you add a wrong lot number, the exclamation point is prompted implying that the lot is not in the system. This happens when you might add a lot number that was on a previous order and you thought that lot was still in the system.
9. Loading process is very simple and once you finish, click Loading Complete.
The message box asking you to confirm the changing of order status will be displayed.

10. Click Yes.
An outbound order is loaded.
Another way to do this is actually scanning the pallet id on the label. So if you have a station set up, take wireless scanner, go to the pallet id, scan in the lot and it’s going to be automatically added in.
This is how you load an outbound order.