Configuring Company Settings
This tutorial shows you how to configure your Company Settings.
1. Navigate to Settings> System Settings.

The Admin page will be displayed.
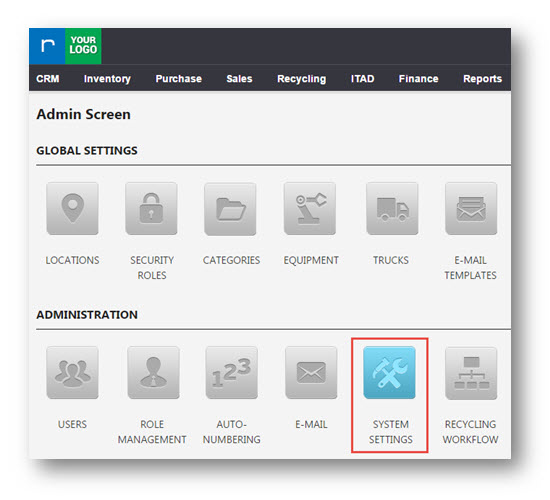
2. In ADMINISTRATION section, navigate to System Settings tab.
The System Settings page is displayed.
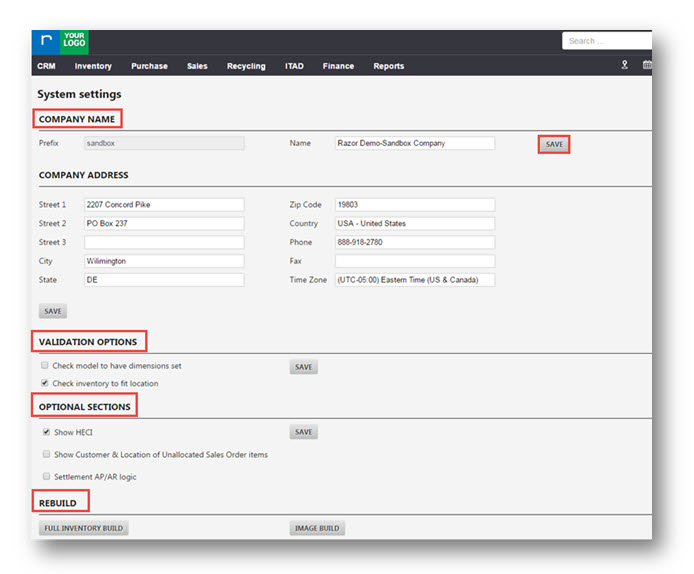
3. You can edit the company name in Name field.
4. Enter the various address details such as Street 1, Street 2, City, State etc., in COMPANY ADDRESS section.
5. Click SAVE.
6. Select various validation options available from VALIDATION OPTIONS field and then click Save.
7. Select required options from Optional SECTIONS field and then click Save.
8. Click Rebuild to rebuild the entire system.
Scroll down for more options.

In the LOGOS section, the list of logos is displayed.
9. Select the logo which has to be displayed in particular section of the page. The available options are Header, PDF Header, Signature, Client Portal Login. Select the respective radio buttons.
10. Add the required attachment files by clicking Add Files. For example, select the PDF header radio button.
The PDF logo will be displayed in the header section of all the PDF files.
11. Select the Header radio button in the row of second logo.
The second logo will be displayed in the header section of the page.
12. Select the Client Portal Login radio button in the row of third logo.
The third logo will be displayed in client portal login.
This is how you configure company settings.