Administering the Recycling Workflow
This tutorial shows you how to administer your Recycling Workflow.
Before we create a recycling workflow, let us see where we use them.
1. Navigate to Recycling > Inventory Detail.
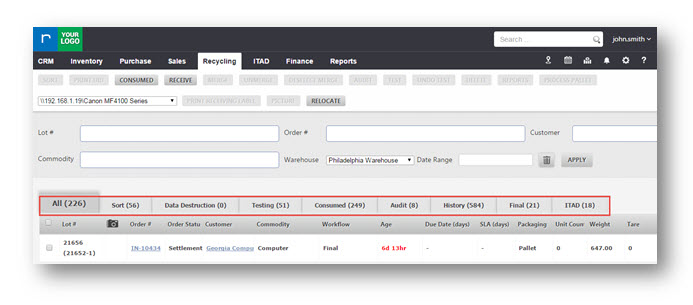
The Inventory Detail page is displayed.
The existing workflow tabs are displayed.
You can add new workflows to the existing tabs.
Add/Edit a Recycling Workflow
1. Navigate to Settings> System Settings.
The Admin page will be displayed.
2. In ADMINISTRATION section, navigate to RECYCLING WORKFLOW tab.
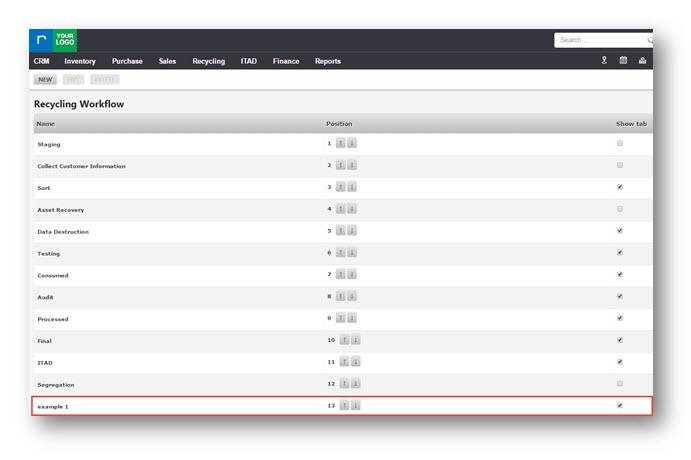
The Recycling Workflow page is displayed.
3. Click NEW.
The Create Recycling Workflow Type dialog box is displayed.
4. Enter a new workflow name in Name field.
5. Select the Is Visible checkbox by checking to make the workflow visible in the Inventory Detail page.
6. Click Ok.
The created workflow name is updated and displayed in the list.
Show Tab is automatically checked for the new workflow created.
7. You can also alter the position of the workflows by editing in the Position field.
8. Show Tab can be checked or unchecked against the respective names so that the workflow name can be displayed or hidden in the Inventory Detail page.
You can also edit a recycling workflow.
9. Select the workflow you want to edit and then click EDIT.
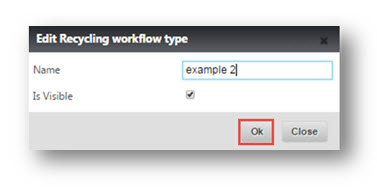
The Edit Recycling Workflow Type dialog box is displayed.
9. Edit the name of the workflow.
10. Click Ok.
The change made to the workflow is updated.
Now navigate to Inventory Detail page and review the new workflow. It is visible with other workflow tabs.
You can also remove a workflow tab that is no longer used.
Remove a Recycling Workflow
1. Navigate to Settings> System Settings.
2. In ADMINISTRATION section, navigate to RECYCLING WORKFLOW tab.
The Recycling Workflow page will be displayed.
3. Select the workflow that you want to remove.
4. Click DELETE.
The selected workflow will be deleted.
5. Navigate to Recycling> Inventory Detail.
Observe that the deleted workflow is not displayed.


