Create a Purchase Order and Receive Unknown Items
This tutorial will show you how to create a purchase order and receive items. This is a comprehensive tutorial.
1. Navigate to Purchase>Purchase Orders.
The Purchase Orders page will be displayed.
2. Click NEW.
3. Select the name of the vendor from the Vendor drop down list.
4. Select the warehouse from the Warehouse drop down list.
5. Select the provider from the Provider drop down list.
6. Enter the notes if any, in the Internal Notes field.
7. Click SAVE & APPROVE.
8. Now copy the Purchase Order number.
9. Navigate to Inventory>Receive Inventory.
The Receive Inventory page will be displayed.
10. Paste the purchase order number that was copied in the PO# field.
11. Select the model from the Model drop down list.
12. Click () to generate unique serial key in the Serial field.
13. Select the condition of the model from the Condition drop down list.
14. Select the warehouse location to assign from the Assign Location drop down list.
15. Select the grade from the Grade drop down list.
16. Click Create & Clear.
The model will be created successfully and displayed in the list of models.
17. Select the model from the list by checking the checkbox.
18. Click BULK INSERT.
The Bulk Insert dialog will be displayed.
19. Enter the quantity of the item in the Quantity field.
20. Click GENERATE.
21. Click Save.
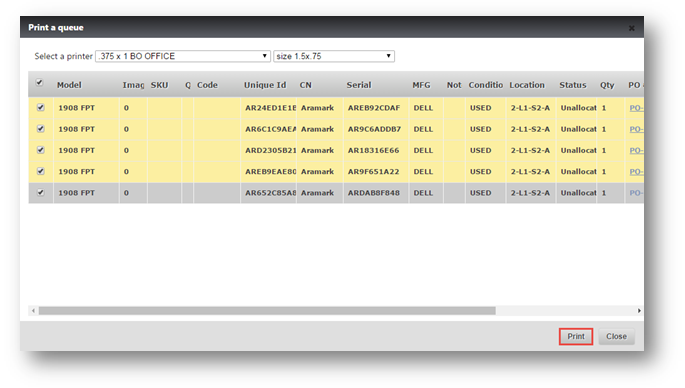
The Print a Queue dialog will be displayed.
22. Click Print.
The item details will be printed.
Similarly follow the above steps to add more items.
You can view that the multiple items have been created successfully.
23. Click () icon.
The Receive Against confirmation dialog will be displayed.
24. Click MARK READY TO CLOSE.
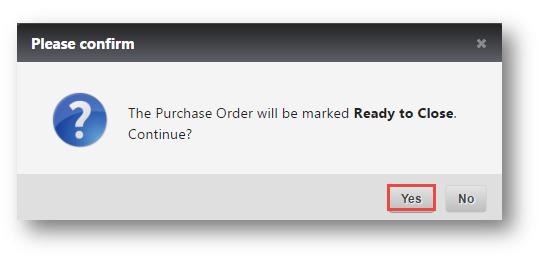
The notification asking to confirm the marking of the purchase order as ready to close, will be displayed.
25. Click Yes.
26. Navigate to Purchase>Purchase Order.
The Purchase Order page will be displayed.
You can view that the orders are created.
27. Select the order by double clicking it.
The list of items related to the selected order will be displayed.
28. Select the checkbox in the top of the column to select all the items in the list.
29. Click PRINT.
The report will be printed.
30. Enter the cost in the Cost field for each of the item.
The cost for each item of the selected purchase order will be saved.


