Qualify a Resale Item
This tutorial shows you how to qualify an item for resale. Once the item is qualified, it will then be pushed to your store where you can choose to push it to your store front, ebay, or Amazon.
1. Navigate to Inventory > Items to Qualify.
The Items to Qualify page will be displayed.

We have a list of inventoried items. Any recently inventoried items will show up in the top of the list. Obviously the newest on the top and they get older as they go down.
2. Double click an inventory to open it in a new tab. In the example, OPTIPLEX 790 hard drive is selected.
The first thing you should do while qualifying an item is to make sure that the pictures are attached. To do so, go to the Images tab.

In the example, you can see that there are no pictures currently. If in the past, there have been other items of the same model number with different SKU conditions (such as may be this one is perfect and other ones had slight scratches), then the master item images will show the other hard drives here. So in the case of a laptop, may be there is one that has a scratch on the top but you can use the picture of its keyboard from an older laptop here. So be careful when you are using master item images because they may not be exactly what you want for your item. But you could always select Add Files.
The standard Open dialog will be displayed.
3. Select the image file from your computer or in a networked drive that is attached to your computer.
or
Simply click image file on your computer, drag the photo over to image section and drop it. The image will be uploaded and attached to the item. You can later view and check the item.
If you have multiple separate pictures such as a laptop or LCD monitor, then you set as Base, Small or Thumbnail to be displayed on your sales channels.
4. Navigate to Qualify Item again.

5. Set the price in the Price field. In the example here, 99.95 is entered.
6. Most important thing that goes for the sales channel is your description in SKU Title. So this example shows the title as DELL OPTIPLEX 790 TESTING REQUIRED. It is based on this description, the people will be interested in buying the product.
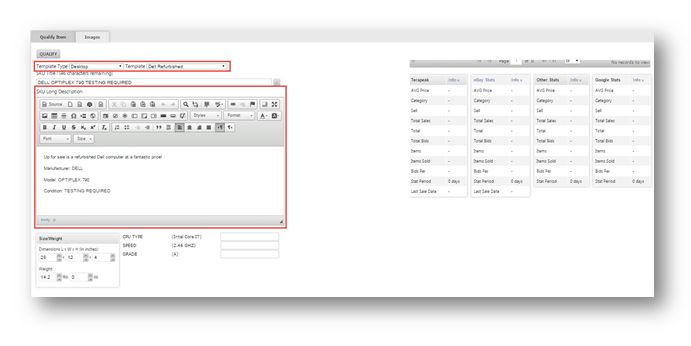
7. You can then scroll down and select whatever you want that’s in the template and fill in your new information. It is important point to note that the template is based on the type of the template selected from the Template Type drop down list.
Suppose you are adding a category of item that does not have a template yet. Then you must make one yourself. If you do not have the permission to add one, then you have to contact the system admin and get a new template for you.
8. Make any necessary changes.
9. Then scroll up and click Qualify.
On the top right, you will see the message box informing you about the successful qualifying of the item will be displayed.
At this point, the item has been pushed up and you can automatically or manually put it on any store fronts you would like to.