...
- Install QuickBooks on a server or machine that is available 24 hours a day 7 days a week.
- Estimate Time: 1 hour
- Team Responsible: IT/Infrastructure Team
- On the public firewall, forward all traffic on ports 2080 8166 and 4500 to the server that has QuickBooks installed in step #1 above.
- Estimated Time: 30 minutes
- Team Responsible: IT/Infrastructure Team
- Configure nSoftware's QbConnector, QODBC and Razor to use client's QuickBooks using the instructions described below.
- Estimated Time: 2 hours
- Team Responsible: IT/Infrastructure Team
- Notes: This configuration process may include one or more computer restarts so it is best done outside normal business hours.
...
Please familiarize yourself with the various attributes necessary for the QuickBooks integration. If you don't have some of the "required" pieces of information below, please be sure to retrieve them from your IT administrator before configuring this integration.


General
- Your Public IP Address
- Required
- Description – This is the public IP address of your company that is used to access the internet.
- Determination – Open a local session on the server that has QuickBooks installed and navigate in a browser to whatismyip.com. This site will tell you what IP address the server uses to access the internet.
- Port
- Required
- Description – This is the port used by the main/outbound QuickBooks connection using nSoftware's QbConnector tool. The default port is 20808166.
- Determination – Use 2080 8166 as the default unless that port is already occupied by a service on your company's WAN or LAN networks.
- Qb User Name
- Required
- Description – This is the user's name that has access to your company's QuickBooks file.
- Determination – In QuickBooks you should setup a new user exclusively used by Razor to access your company's QuickBooks file.
- Qb User Password
- Required
- Description – This is the user's password that has access to your company's QuickBooks file.
- Determination – This is assigned to the user account created (#4 above) when that user is designated for exclusive access to the company's QuickBooks file.
- File Path
- Required
- Description – The local file path where your company's QuickBooks file is stored.
- Determination – Open up QuickBooks and find where the company file is saved on the local file system or network.
...
- Inbound
- Optional
- Description – This Razor connection tests the success or failure of your configuration's ability to import data from Razor to your company's QuickBooks installation. This is not needed to be successful for the QuickBooks installation to work properly. Only Outbound (#2 below) is necessary for a successful QuickBooks installation.
- Determination – If your configuration is correct and the infrastructure is setup properly on your company's network than this should test successfully.
- Outbound
- Required
- Description – This Razor connection tests the success or failure of your configuration's ability to export data from Razor to your company's QuickBooks installation.
- Determination – If your configuration is correct and the infrastructure is setup properly on your company's network than this should test successfully.
Configuration – Inbound
Configuration – Preparing
Download archive QuickBooks.zip and extract it. Archive contain installer QODBC Driver - “qodbc_18.00.00.326.exe” and folder with “RemoteConnector”
Configuration – Inbound
These are the steps necessary to configure your company's company’s QuickBooks integration to receive data into Razor.
- First, click this link to download the QODBC.exe to the QuickBooks server in preparation to install and configure the QODBC connection.
...
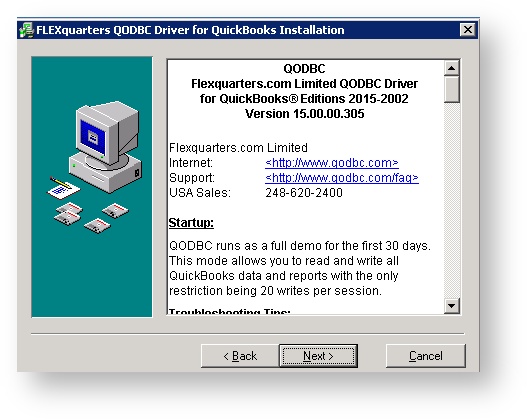
- Once the archive is downloaded to your QuickBooks server and extracted, double-click the executable file (qodbc_18.00.00.326.exe) and it should launch a screen like below.

32. Click "Next >"
43. Click "Next >" (Change your QuickBooks region of necessary)

54. Click "Next >"

65. Click "Next >"

76. Click "Next >"

87. Click "Next >" and the program will begin to install like in the screenshot below.

98. Once Once complete the program will render the screen below where you may click "Finish" “Finish” to complete the installation. Your computer may ask you to restart it, so please do so if it does request a restart.

109. Once the installation is complete and the server is restarted if it is needed, then we can continue with the configuration. Navigate to the program files indicated in the screenshot below and launch the program "Configure QODBC Data Source."

1110. Click the "System DSN" tab and navigate to the data source name titled "QuickBooks Data."

1211. A new window will open that looks like the screen below. First, populate the TextBox titled "Locate a company file" with the full path of the company file. An example is listed below. Then choose "Multi-user mode" from the "Mode when opening" radio button area near the bottom of the screen.
- Example Company File path
- C:\Users\Public\Documents\Intuit\QuickBooks\Company Files\RazorERP.qbw
- Example Company File path

1312. Next, click the "Test Connection to QuickBooks" button. After you click this you should see a box like this below. That is okay.

1413. Next, ensure that the QuickBooks application is launched and running under the QuickBooks Admin account user. Then, go back to your Start Program Files and find the program titled "VB Demo" you can launch this and choose "Connections > Add New Connection." Then click the "Machine Data Source" tab and choose "QuickBooks Data" then click the "OK" button. Go to the QuickBooks program which is already open and you will see a dialog box like the one in the screenshot below. Choose to link this access to the "Razor" user you created in QuickBooks and click the "Continue" button.

1514. Another small dialog will pop up like the one in the screenshot below and choose "Yes" to confirm this connection's access. Click the "Done" button to complete this confirmation process.]
...
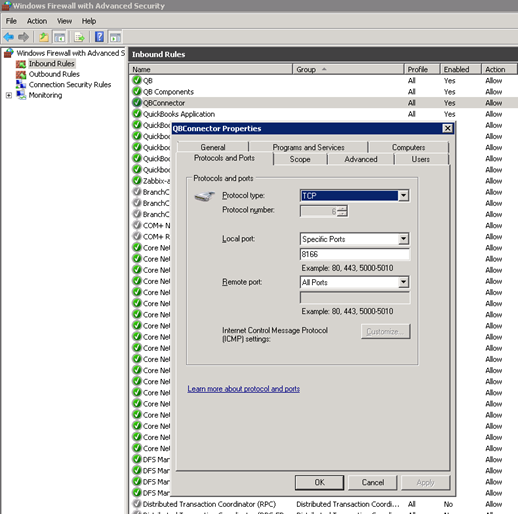
- First, on the Windows machine where QuickBooks is installed, open up TCP port 2080 8166 for Inbound traffic using Windows Firewall with Advanced Security program.

2. Open a Remote Desktop (rdp) session to whichever server is hosting the QuickBooks company file and then click here to download the following files
- Files
- QBConnector.exe
- QBConnectorService.exe
- QBConnectorService.ini
- Files

3. After downloading the QbConnector.exe file locally (unzip as needed), double-click it to launch the program. Once it is open you should see a screen like below.

4. Next, click on the Users tab and click the Add button. Once the Add window is open, complete the entries using the same values that you populated in the Razor QuickBooks Integration System Settings page. Example values are included in the screenshot below.
- The following fields below should remain as default
- Application Name
- Connection Mode
- Authentication Mode
- The following fields below should remain as default

5. Next, navigate to the Razor QuickBooks settings page located at the URL below and click the TEST CONNECTION button while simultaneously watching the QbConnector tool on the QuickBooks server with QuickBooks open in the background like the screenshot below.
https://demo.razorerp.com/Admin/SystemManagement/QuickBooks.aspx

...
- Place folder “RemoteConnector” to root of disk “C:\”
- Run C:\RemoteConnector\RemoteConnector.exe
- Click “Add user” on “Users” list, type “User”, “Password” and “Company File”. Click “Test Connection”. On the issue of "Autorize now?" answer "Yes"

- Open QuickBooks as an administrator.
- Click “OK” on Application Autorization on QBConnector

- You will see the prompt below asking you to assign the privileges and user to the user who is not trying to connect to QuickBooks (the user that you setup in step
...
- #7 above). Choose
...
- “Yes,
...
- always” and assign the Login user as the user that you created explicitly for accessing QuickBooks such as
...
- “qb_
...
- user” or “razor” or whatever is the name of the user you setup for the
...

...
- You will be asked one final time to confirm this access and just click DONE.

...
- Change port on base to 8166
- Finally, launch the QuickBooks program and with the correct settings in place you should be able to push Finance objects at your
...
- company’s path below into your QuickBooks installation.
- https://demo.razorerp.com/Admin/Finance.aspx
- Also, you may test your
integration's - integration’s configuration by going to the System Settings page where you configured the integration in Razor and by using the TEST CONNECTION button to ensure the connection is successful. If it is successful, you will see the messages below.

- integration’s configuration by going to the System Settings page where you configured the integration in Razor and by using the TEST CONNECTION button to ensure the connection is successful. If it is successful, you will see the messages below.
Troubleshooting
- Why can't I connect Razor to my QuickBooks?
- I followed your guide but I still can't connect Razor to our company's Quickbooks
...