In this tutorial, we will show you how easy it is to receive an Inbound Order in RazorERP.
| Widget Connector | |||||
|---|---|---|---|---|---|
|
...
|
...
|
...
Go to RazorERP.

Click Recycling, then Inbound Orders.

Once loaded, you’ll notice several tabs and by default you’ll be in the Pending tab. This is followed by Scheduled, Delivered, Partially Received, Received, Settlement Complete, Cancelled, Quotes and Portal Quotes.
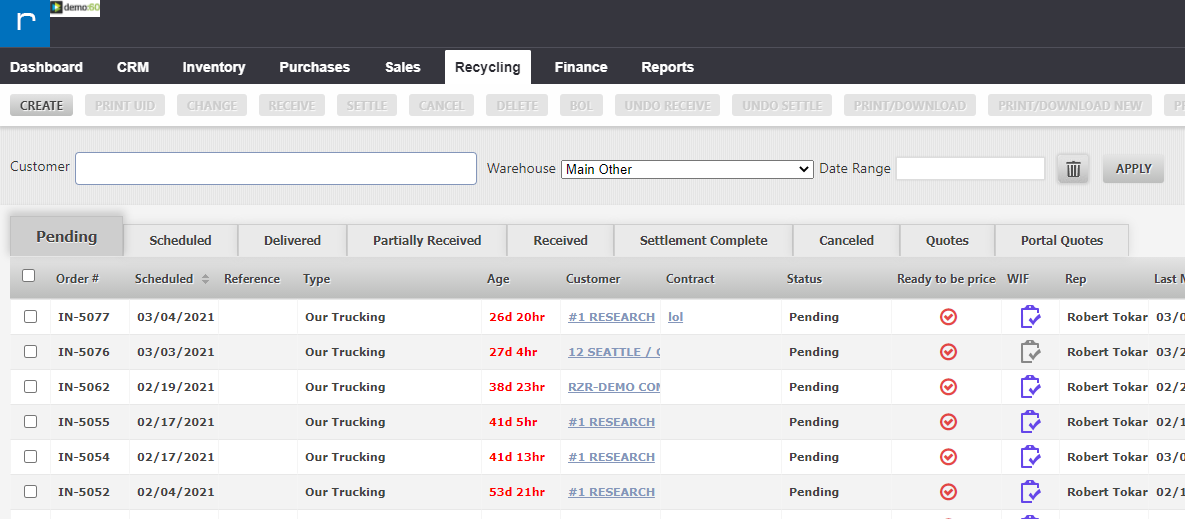
Typically, you may search an order from the Search box located on the right side of the screen.

Once the result has been provided, double-click the order.

A new window shall appear and it would take you to the Receiving Inbound Order page.

You may start by selecting an Item Type, click on the ITEM text box.

Enter the weight and other information. One of them is Packaging, which now has different types of packaging option available to you.

Select the correct Workflow.

Once this part is done, click the Add button. It should ask you as well if you want to Print a label.

If you want to make an update on an already saved Lot, just select one from the list. Aside from Update, you can Delete, Print, or click Upload Image. (When updating a Lot, ensure that you click the Update button instead of Add, to avoid redundancy.)

Once all required Lots were added, click on Receive Complete button found at the bottom-center part of the page, just before the Information tab. (This option would also automatically send emails to relevant personnel related to this order.)

You may also Print and Download the details for this order. Just click on the Print/Download button at the top of the page.

The Print Dialog will appear, select the type of Report and the format you like. Then click the Print or Download button found at the bottom-right portion, depending on your requirement.

...