Create an Inbound Order and Apply a Price Sheet
- Lakshmi Pulomas (Unlicensed)
- Robert Tokarchyk
- MatthewM (Unlicensed)
This tutorial shows you how to create an inbound order and apply a pricing template.
1. Navigate to CRM>Accounts.

The Accounts page will be displayed.

2. Select the name in the list for which you wish to create an inbound order and apply price sheet.
3. Click SCHEDULE INBOUND.
The Create Quote/Order dialog will be displayed.
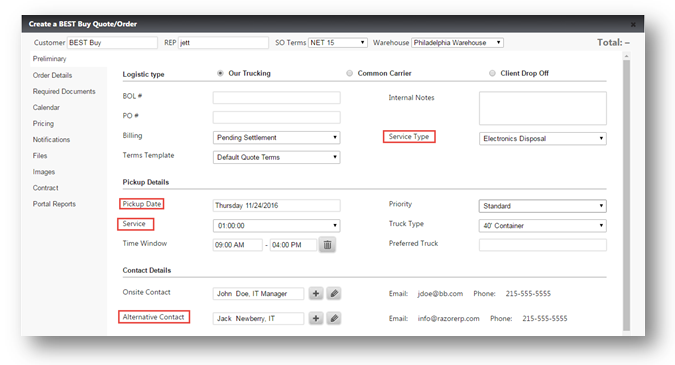
Note: Enter the custom values in the required fields.
In this example,
4. Select the type of service from the Service Type drop down list.
5. Select the date from the Pickup Date calendar.
6. Select the time of service from the Service drop down list.
7. Select the alternative contact from the Alternative Contact drop down list.
Scroll down for more options.
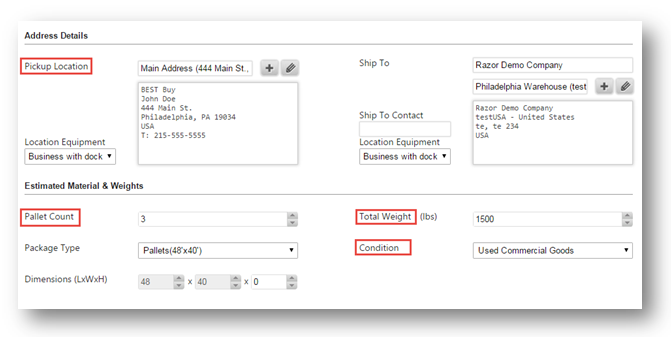
8. Select the location of the item from the Pickup Location drop down list.
9. Select the location to where the item has to be shipped from the Ship To drop down list.
10. Select the number of pallets from the Pallet Count field.
11. Enter the weight in the Total Weight field.
12. Select the condition of the item from the Condition drop down list. The available options are New Commercial Goods and Used Commercial Goods.
13. Navigate to Order Details section.
The Saving Quote/Order dialog asking you to confirm the way in which the order must be saved,will be displayed.

14. Click As a Quote.
The message box confirming the successful creation of the quote will be displayed.

15. Click OK.
The Order Details section will be displayed.

16. Enter the location of the equipment in the Location Details section.
17. Select the required building logistics from the Select applicable building logistics section.
18. Enter the building notes if any, in the Building Notes field.
19. Enter processing notes in the Pickup/Processing Notes field.
20. Select the equipment required in the Equipment & Supplies Required section by checking the checkbox for the equipment and entering the number of supplies required for the selected equipment in the text box.
21. Enter the Equipment Notes field.
22. Navigate to Calendar section.
The Calendar section will be displayed.

You can view the orders based on month, week and day.
23. Navigate to Pricing section.
The Pricing section will be displayed.
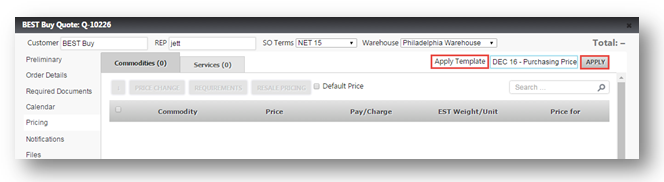
24. Select the template that you wish to apply for the order from the Apply Template drop down list.
25. Click APPLY.
The notification asking to confirm what would you like to do with the order will be displayed.

26. Click Update pricing and Add items.
The items will be added and displayed under the Commodities tab.

27. Select the commodity that you wish to change the price by checking the respective checkbox.
28. Enter the price of the commodity in the Price field.
29. Navigate to Services tab.
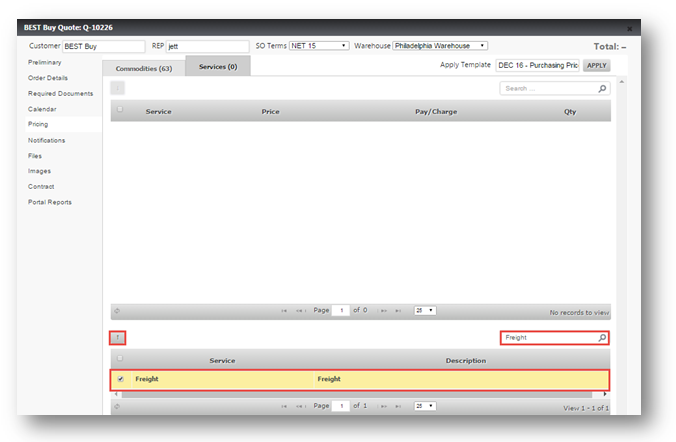
30. Enter the name of the service in the Search field.
The searched service will be displayed.
31. Select the service by checking the box for the service.
32. Click ( ) icon.
The service will be displayed under the Service tab.

33. Select the service.
34. Enter the price of the service in the Price field.
Note: You can add, delete files in the Files section and add or remove the contracts in the Contracts section.
35. Navigate to Portal Reports section.
The Portal Reports section will be displayed.

36. Select the type of report that you wish to allow the clients to view in the Client Portal by checking the respective check boxes. The available options are Settlement Report, Settlement Summary, Picture Report, Certificate of Recycling, AP Invoice/AR Invoice and Audit Report.
In this example, Certificate of Recycling have been selected.
37. Click Convert to Order.
The message box informing that the order has been saved successfully will be displayed.

38. Click OK.
The inbound order will be created and price sheet will be applied.