Create a New Sales Order
- Lakshmi Pulomas (Unlicensed)
- Matthew McCollum (Unlicensed)
This tutorial demonstrates how to create a new sales order. A sales order gives the information regarding the particular sale of an item by the company. For every sale of an item, a sales order is created.
1. Navigate to Sales > Sales Order.
The Sales Order page will be displayed.
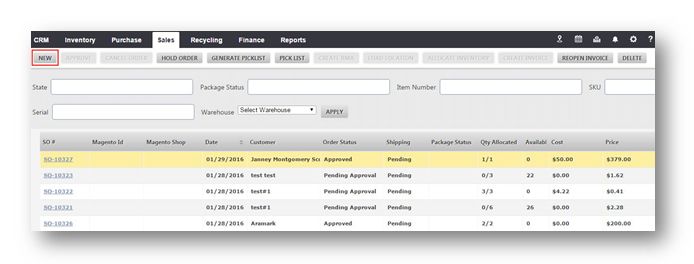
2. From here, you can view previously created sales order. To create a new sales order, click New.
The message box informing you that blank order will be created and allowing you to edit will be displayed.

3. Click Yes.
The new order page will be displayed.

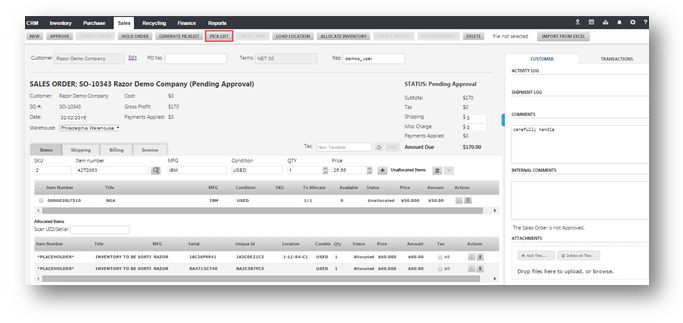
4. Enter the customer name.
5. A sales order number is automatically assigned to the sales order. In the example above, SO-10328 is assigned.
6. In the Items section, you can assign items to the sales order. If you know the SKU number of the item, you can just select it from the list.
7. Enter the first 2 letters of the item number you want to apply and then select it from the Item Number drop down list.
8. The MFG field is automatically assigned as available in the master items list.
9. Select the condition of the item from the Condition drop down list. The available options are New, Used, Refurbished, New-Open-Box, As Is, Parts, Scrap, Testing Required, Repair, etc.
10. Set the quantity in the Qty field.
11. Enter the price in the Price field.
12. Click Add ( ) to make it available in the drop down for allocation.
The new item will be added and displayed in the Items list.
13. To manually allocate the item, click the Allocate ( ) button in the row of the item you wish to allocate.
The Allocate Inventory dialog will be displayed.
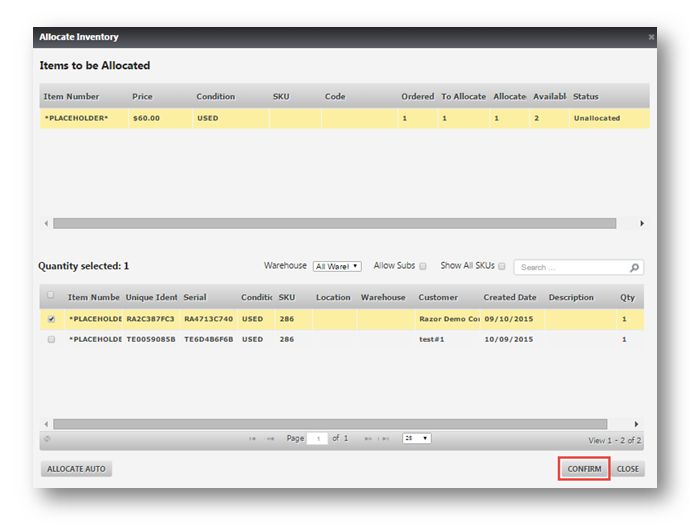
14. Check the box of the item(s) you wish to allocate and click Confirm.
The selected item will be allocated to the order and displayed in the Allocated Items section.
The message box informing you about the automatic allocation of the specific number of items will be displayed.

15. Click OK.
The item(s) will be allocated to the sales order.
16. Navigate to Customer in the right section of the page.
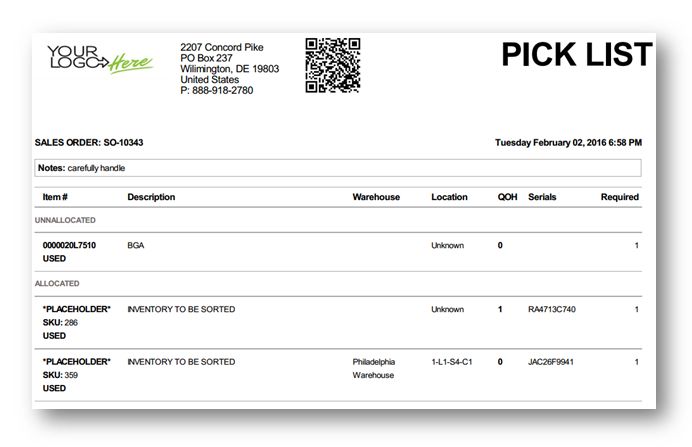
17. In the Comments section, enter the important comments if any, related to the order. For example, “Carefully Handle”.
18. Click Pick List.
The Pick List dialog will be displayed.

19. Select the printer from the Print On drop down list.
20. Click Print Pick List to print the sales order.
The sales order will be printed.
Note: The sales order can be downloaded to computer by clicking the Download button.